
Development of the Interactive Soundchart
The interactive sound chart was created through graphic design, audio recording and coding while consulting with teachers. The soundchart itself is based on Mark Hancock’s new phonemic chart of the sounds of English for the classroom. This overview of the design process can be used as a guide to help create your own Interactive Soundchart.
It would be an advantage to have a basic understanding of HTML. If you have never worked with code before, I recommend watching following videos:
Introduction to HTML – Series by WebDevSimplified
Soundchart Forms
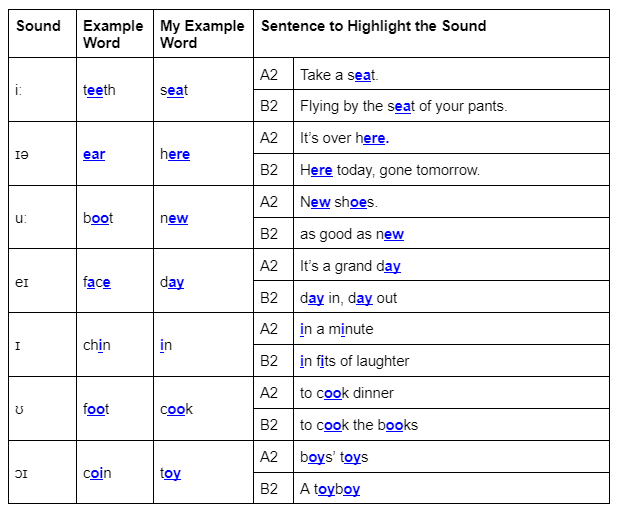
Soundchart forms were given to teachers to help them decide on the words and sentences based on their own accent, which would best model a particular sound to students. The highlighted sounds are graded to suit A2 and B2 level students. An example can be seen below where the sound in each example word and sentence is highlighted.
To take the first step into creating your own soundchart and download our editable pdf of the form here.
You simply fill in the blanks with words and phrases of the appropriate level.
Recreating the Soundchart on Adobe Illustrator
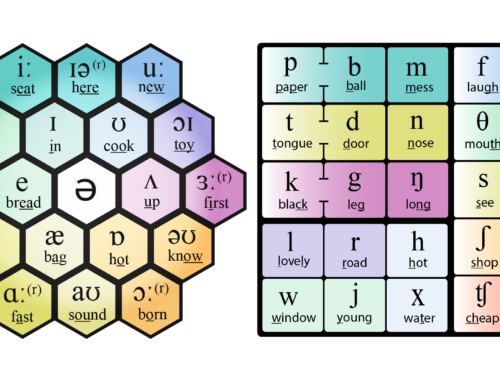
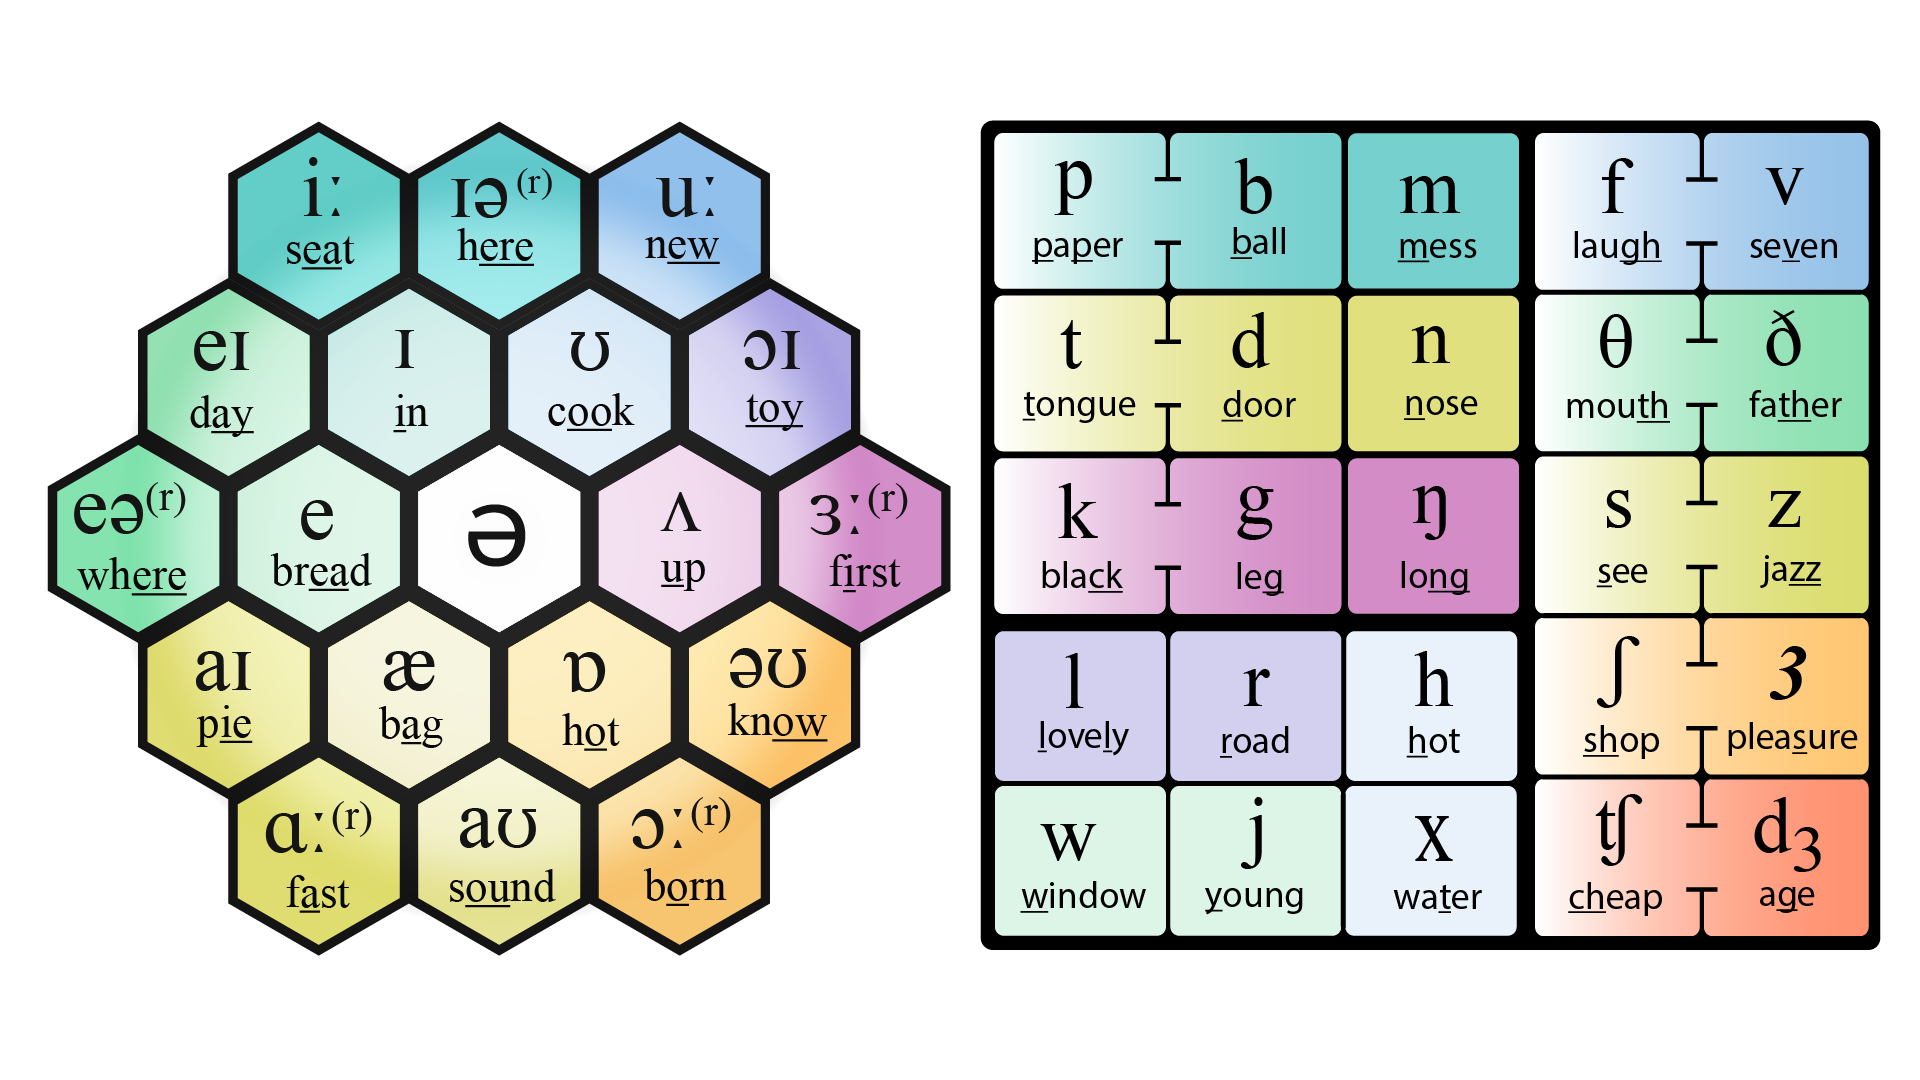
The diagram was recreated using Adobe Illustrator. The completed graphic is exported as an SVG file. Both graphics have already been converted into SVGs for you so you don’t have to worry about creating graphics from scratch.
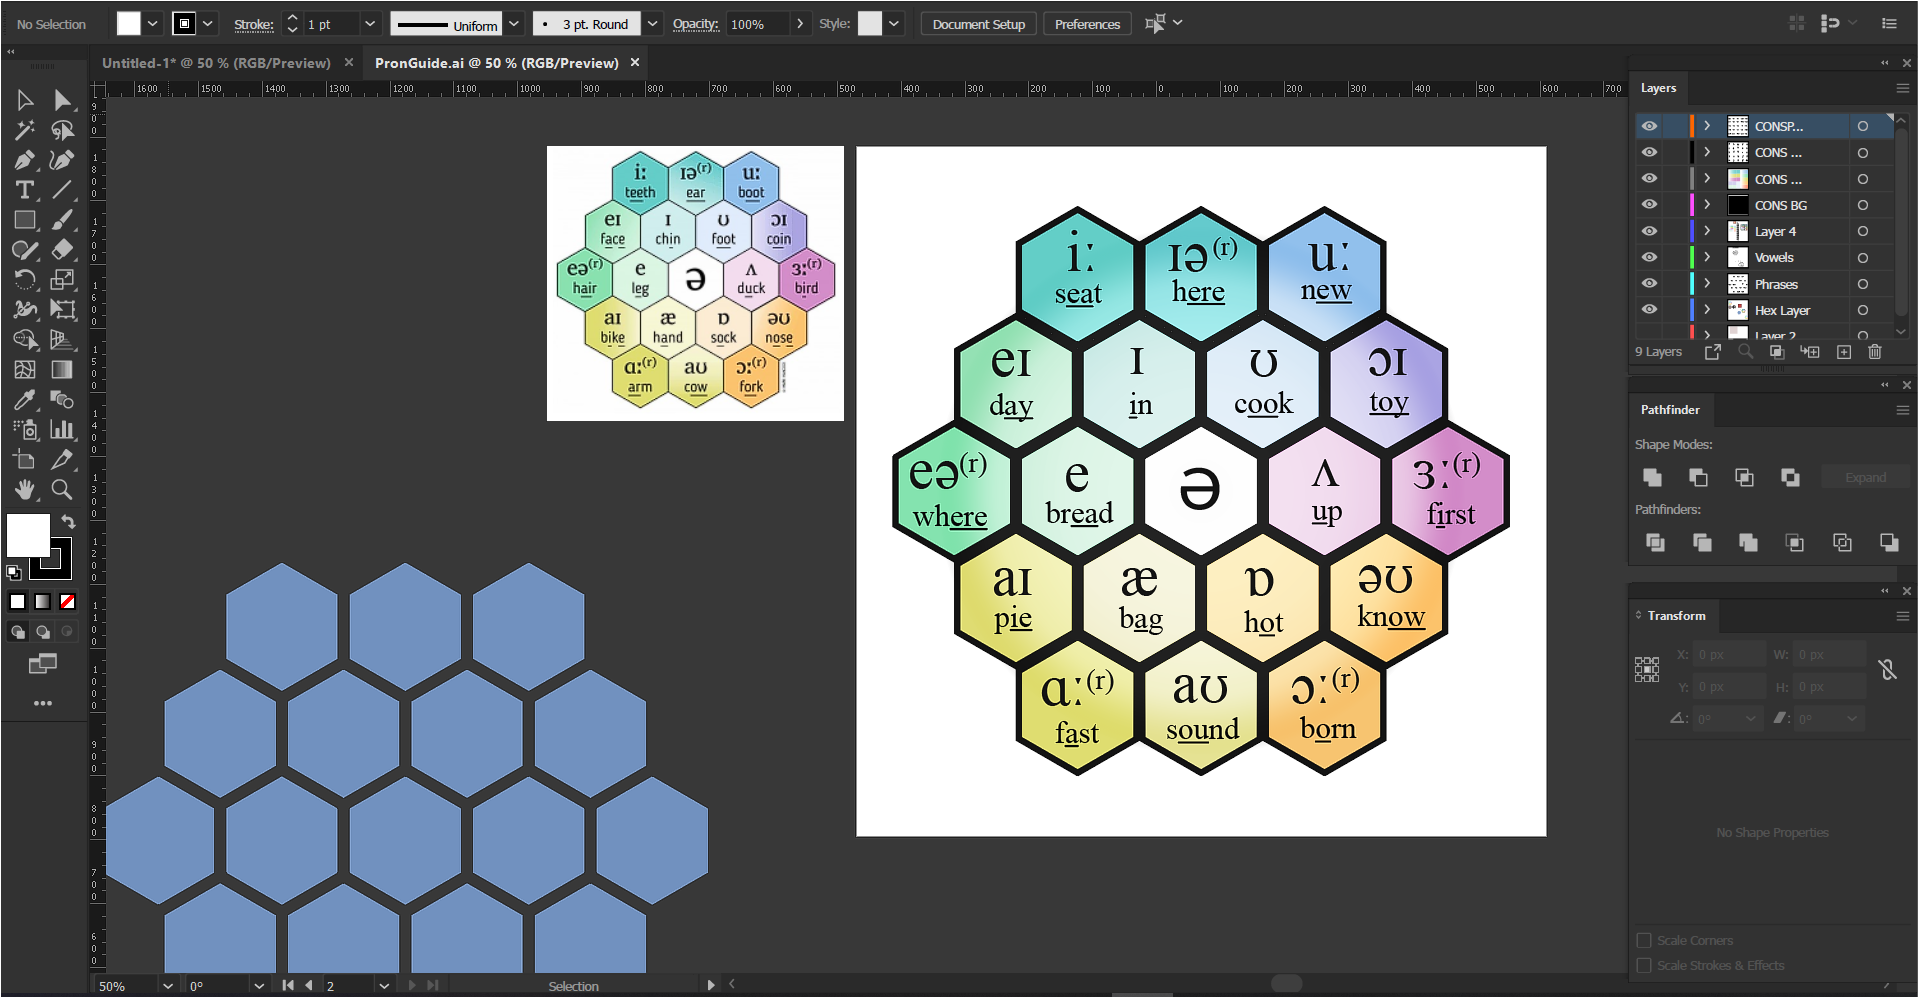
(The graphic of the vowel chart on a hexagonal grid)
SVGs and coding in Atom
SVG (Scalable Vector Graphic) is an image file type which is created by lines of code. This code can be changed to manipulate the appearance of the graphic or new code can be added to create interactive elements. SVGs are a better alternative to PNGs or JPEGs on a web browser as they produce scalable images with no loss in quality.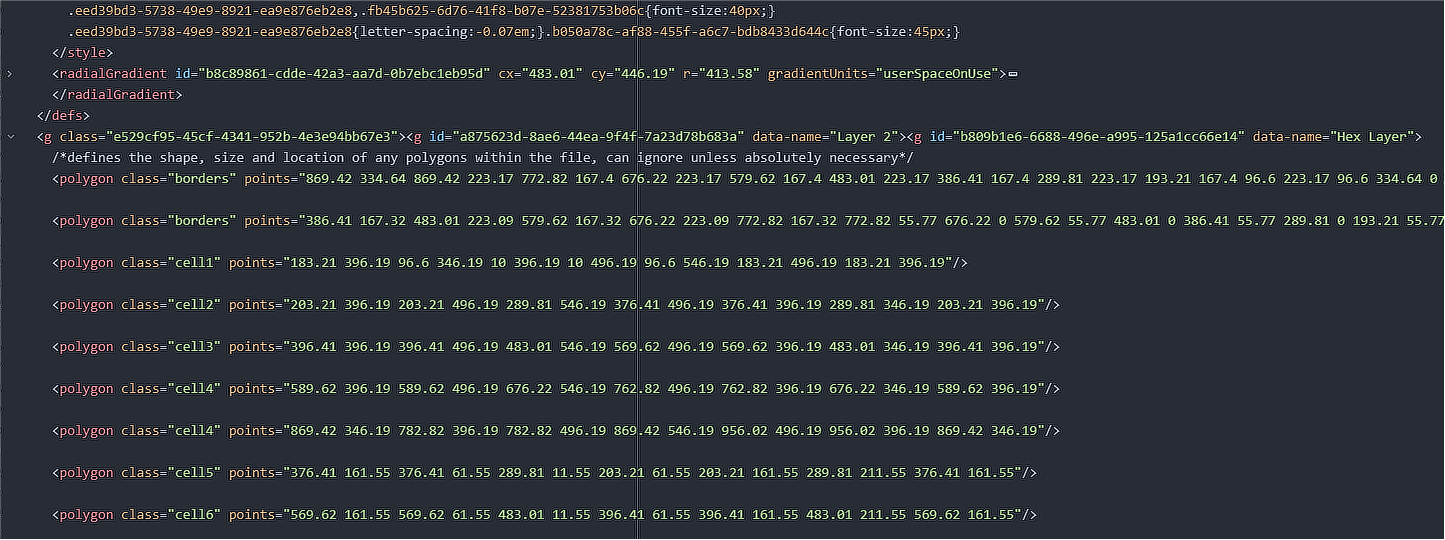
SVGs are a better alternative to PNGs or JPEGs on a web browser as they produce scalable images with no loss in quality. Atom, an open-source and free text editor, is used to create interactive elements in the soundchart by adding javascript to the code.
You will need coding software to create your soundchart. I recommend that you download Atom, a free and open source coding software. The original html and css files were produced on Atom and you can download them here.
Recording Your Audio
Recording Hardware and Software
I recommend using an external microphone to record audio. The in-built mic on your computer will generally produce lower quality audio and should only be used if there are no other options. We recorded with a Maono AU-A04 USB Microphone, an inexpensive, entry-level mic that is easy to set up and produces high quality audio.
Our audio was recorded and edited on Adobe Audition. It is a powerful editing tool which allows you to manipulate audio files in many ways. However, it requires a subscription to the Adobe suite.
I recommend using the recording software which is most accessible to you. There are good free alternatives which you can use in place of Audition. I recommend Audacity for Windows users. For Mac users, I recommend Garageband, which is included by default on Apple computers.
Setting up a Microphone
Connect your microphone to your computer via the USB port. Wait for your computer to recognise the microphone then start up your recording software.
Sometimes, your computer may not recognise a device. In this case you may be missing an audio driver; this is a software component which lets your operating system and recording device communicate.
You can download the driver of your device by Googling the following : Device Name/Model Number + Driver.
Links to setting up a mic on different devices:
In the software, make sure to change the AUDIO INPUT to your microphone.
This is required for the software to know what device it records audio with. Once this is in place, you can begin recording.
Links to setting up mics on different softwares:
Recording the Audio
To begin recording press the red record icon. (red circle)
When you record, take a one second pause between each word and sentence. Do this to give yourself some blank space between each word in the recording. You will find it easier to cut audio when there is space between them and it ensures the sounds of each word do not run into others.
(Recording with blank spaces – see how it is cut at the ends)
When you begin your recording or new take, always perform a clap(sync-clap) to give yourself an audio and visual reference for editing.
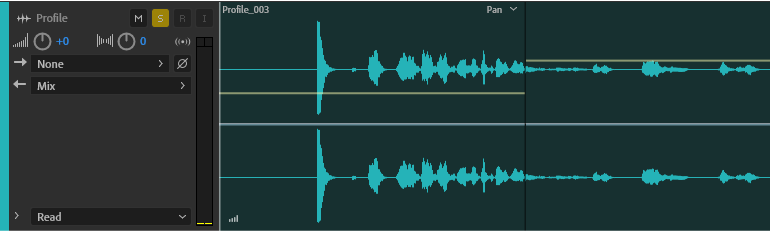
(A sync-clap at the start of the track – the tall and flat waveform indicates the start of a new take)
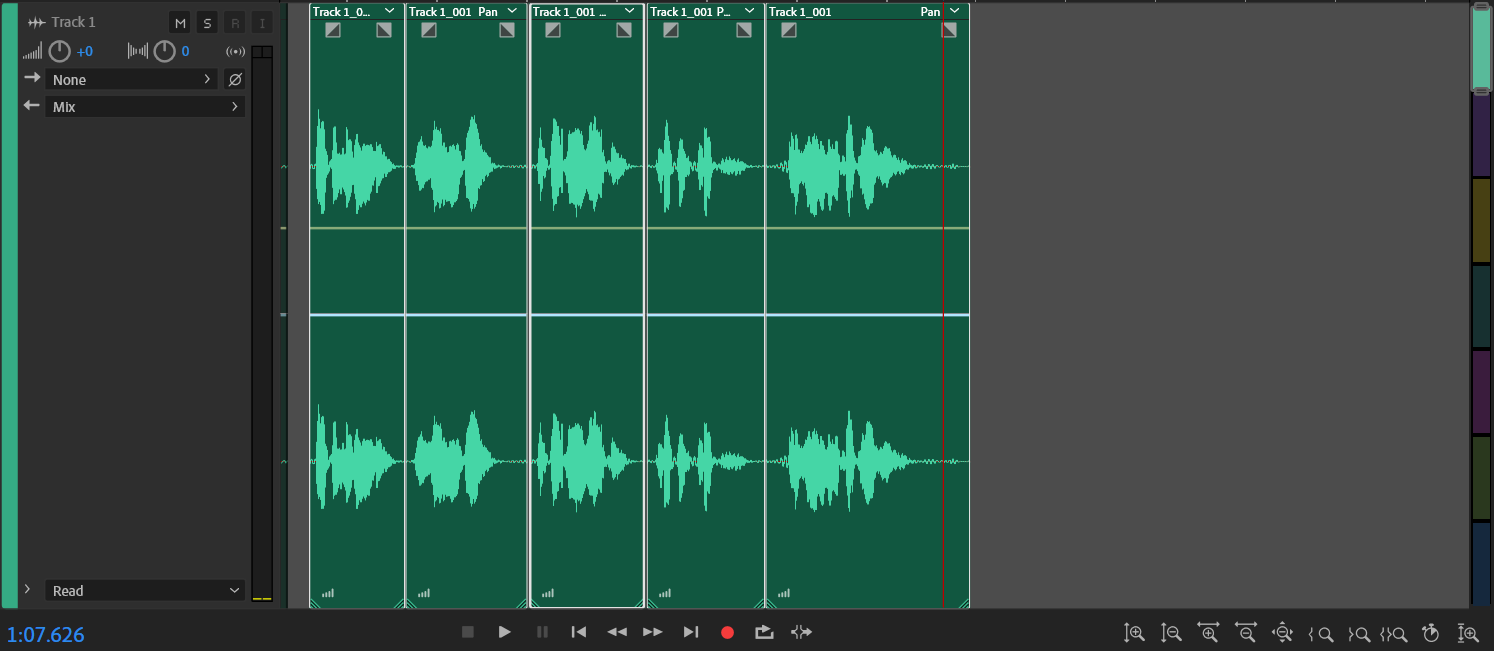
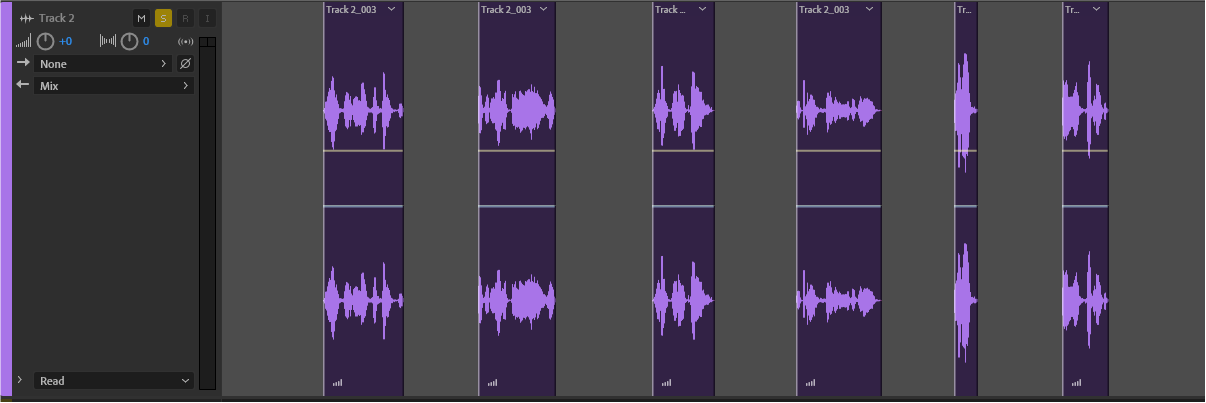
When you record your phrases and sentences it is better to do one long take rather than several shorter ones. Record your words on one track first then record your phrases on a different track after that. Make sure to always label your tracks with a consistent naming convention. For example the naming convention we used was “Teacher Name – Level – Words/Phrases”
(Sample of track with naming convention)
Saving and Exporting your Audio
A good naming convention is important for the organisation of your files. You will be working with multiple audio files which need to be placed within the code so a good file structure will minimise any issue that you could encounter.
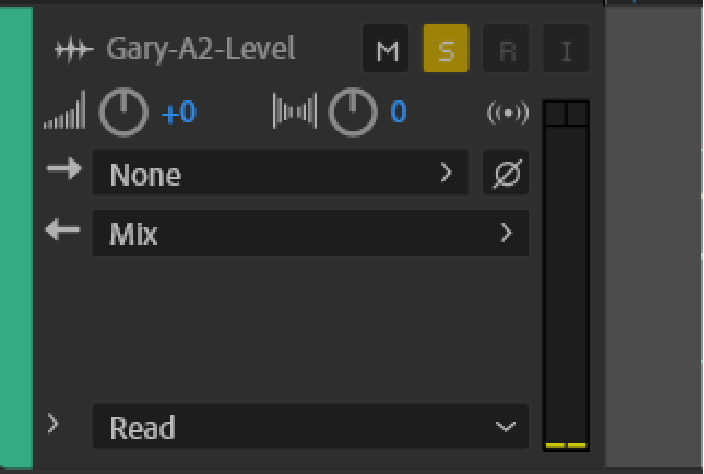
Regardless of software, you need to export each audio clip individually into a new folder. When you export audio files, ensure that they are exported as MP3 or .wav files. I recommend using the following naming convention: Your name + level+ word/phrase. Ensure they are going into a folder labelled with your name and level e.g Gary – A2.

Editing in Adobe Audition
The completed recording is cut and edited in Adobe Audition. The pauses from the previous step creates a blank space, separating each phrase and word and is cut out using the razor tool.
The separate audio files are cleaned up using the “de-noise” preset in the effects rack. Each individual clip is then exported into a folder as a WAV or MP3 file (Audio File Formats).
Inserting the Audio Files into the SVG Code
HTML
There is no need to worry about the coding aspect of the soundchart as the code is already written and ready to be copied. The only thing you need to do is replace the names of the audio files within the code.
Find the code labeled under /*TEXT CONTROLS. You can do this easily by using CTRL+F and typing in TEXT CONTROLS.
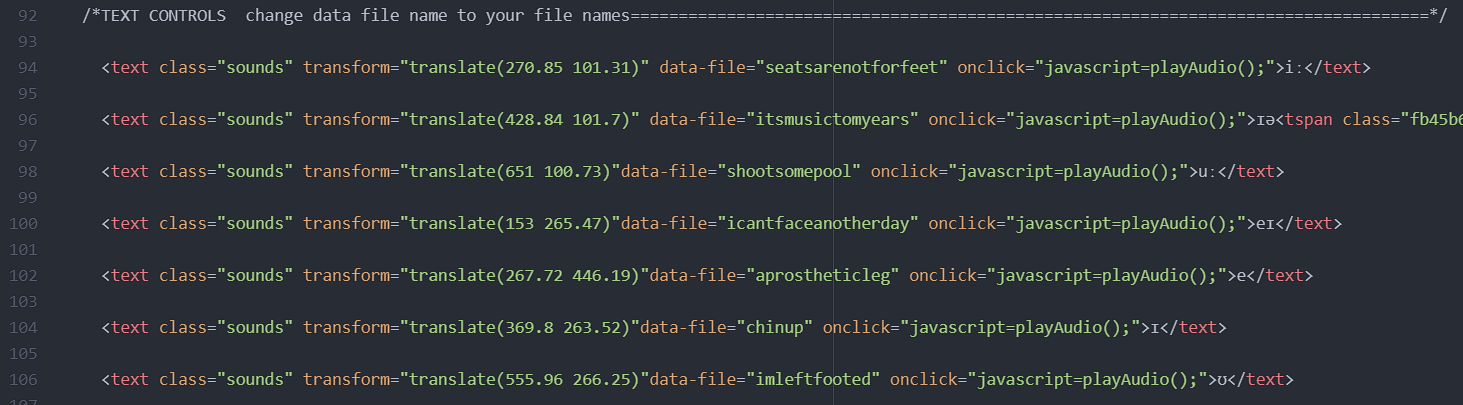
The audio file name is assigned to its corresponding text element through the use of “data-file”. Replace the name in the data file with your own audio file name. This is all you need to do in the html.
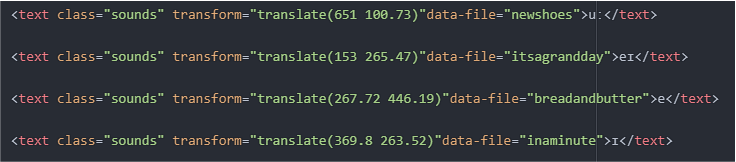
(data-file defines the file name)
Javascript
To save space in SVG, the audio files themselves are not included in the code. A javascript function named “function play (ev)” is used to identify file name, locate that file where it is saved and then plays audio when those parameters are set.
This is triggered when a text element is clicked through “function init()”, its “data-file” is read by “function play (ev)” and this becomes the audio file that plays. This code is explained in detail in this tutorial.
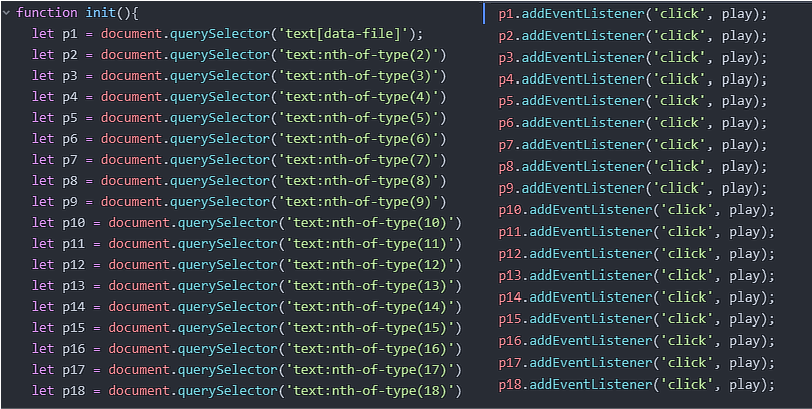
(the function defining the identifying element by clicking)
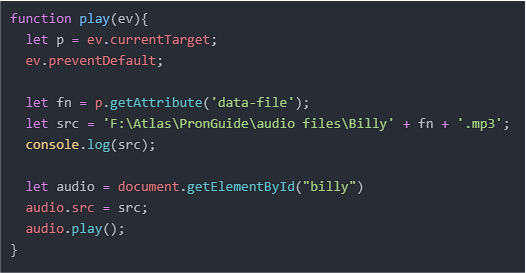
(function play(ev) used to define “file location + file name + file type” and play audio)
There are only two things you need to change in the javascript file.
First, change the audio id to suit your file names. This is the first line of code in the file so it cannot be missed. I recommend using “teacher name + level” as the naming convention for this part e.g. “garyb2”.

Then, you must update the line after let src =. It is very important to fill in this line correctly as it will determine whether or not your soundchart will play audio
.
This line of code means: Let the source file be = “1.file location/folder + fn(ignore this) + 2.file type”
- Paste the location of your files here. If you are loading it through your own computer, click into the folder your files are saved in – right click any file and select properties. A window will open and you should see a file path labeled location, copy and paste this path into the code. If you are loading this through a web browser (wordpress website etc.) all you need to do is open the page where your audio files are saved then copy and paste its URL into the code.
- The last line of the code is where you put the file type. Simply type .MP3 or .wav, whichever you decided to save your audio files as. In our example I used .wav as I exported my audio as wav files.
When this is done, open up your html files with a web browser and your soundchart should be working!
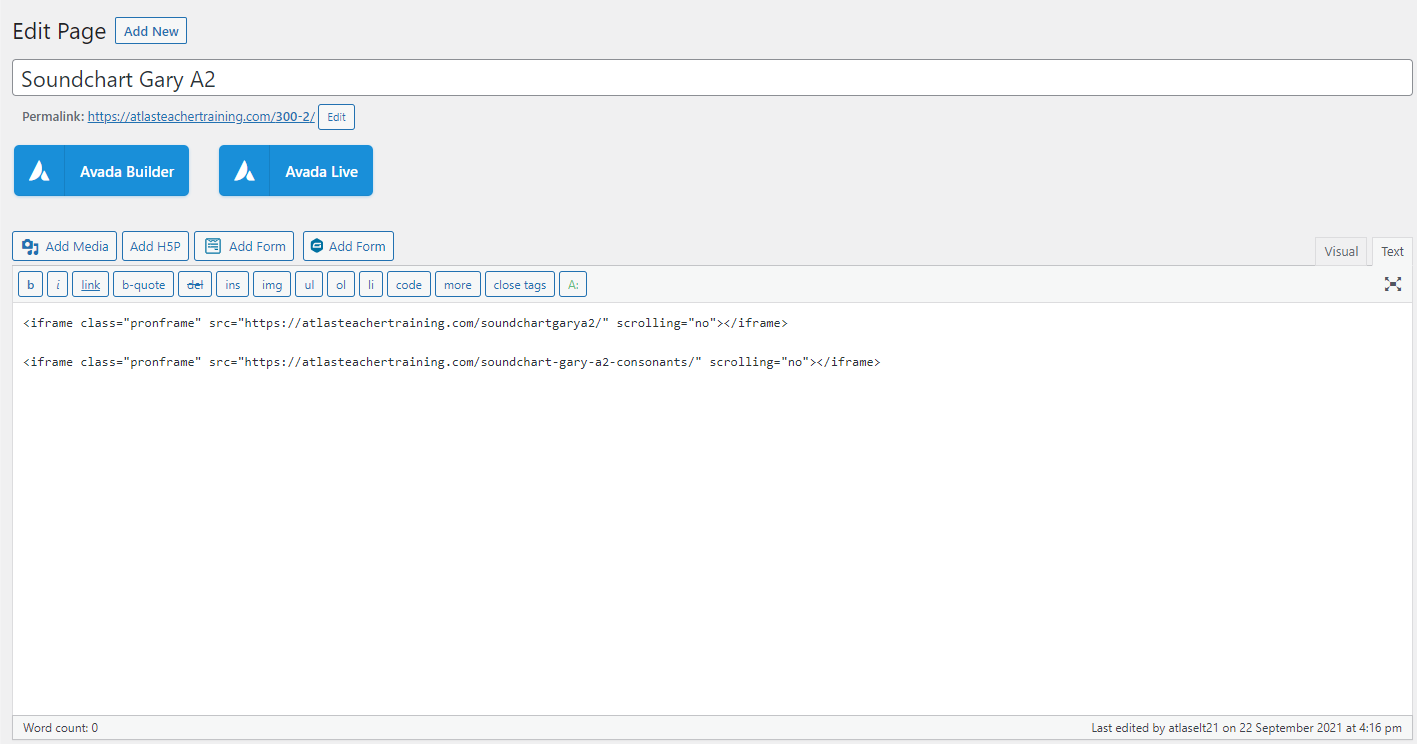
Uploading to WordPress
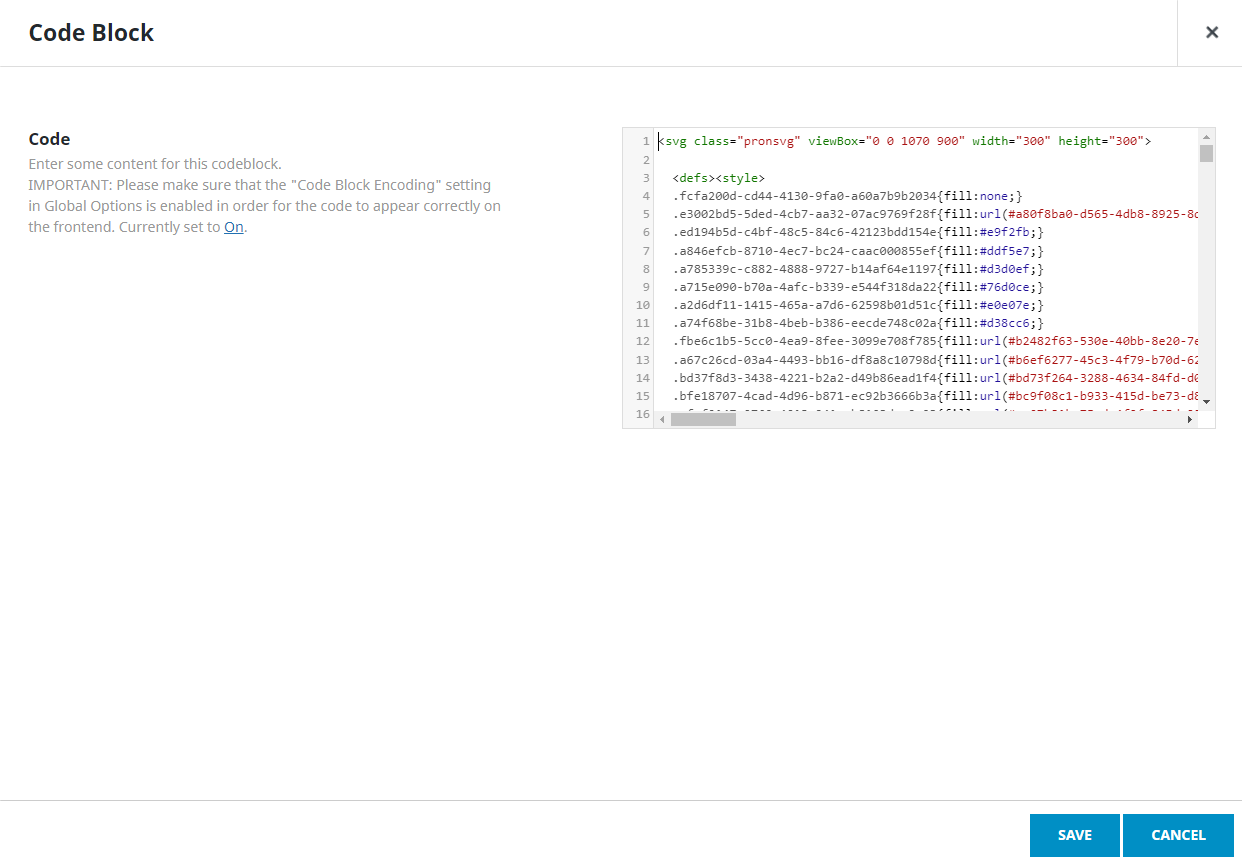
Each vowel and consonant chart are placed in a separate new page. This page contains a “code block” element where the code can be pasted into. The chart will appear on your website when this is done.
Placing both charts in one page prevents the code from being read correctly. They are placed in separate pages and displayed together on a different page through the use of iframes. An Iframe(inline frame) is a HTML document embedded within another HTML document. In this case, both soundcharts are embedded in the page and are viewed through a “window”. Using this method, both will display on the page and function properly.


